|
|

樓主 |
發表於 2010-1-15 23:04:26
|
顯示全部樓層
<P><FONT size=4>Part2 自定色溫的調整方法</FONT></P>
<P><FONT size=4></FONT> </P>
<P><FONT size=4><IMG border=0 alt="" src="http://i469.photobucket.com/albums/rr53/suns0003/1-1.jpg"></FONT></P>
<P><FONT size=4></FONT> </P>
<P><FONT size=4>進 Menu</FONT></P>
<P><FONT size=4></FONT> </P>
<P><FONT size=4><IMG border=0 alt="" src="http://i469.photobucket.com/albums/rr53/suns0003/2-1.jpg"></FONT></P>
<P><FONT size=4></FONT> </P>
<P><FONT size=4>選 "攝影機設定"</FONT></P>
<P><FONT size=4></FONT> </P>
<P><FONT size=4><IMG border=0 alt="" src="http://i469.photobucket.com/albums/rr53/suns0003/3-1.jpg"></FONT></P>
<P><BR><FONT size=4><IMG border=0 alt="" src="http://i469.photobucket.com/albums/rr53/suns0003/4-1.jpg"></FONT></P>
<P><BR><FONT size=4>把 "WB預設" 選到 "手動WB溫度"</FONT></P>
<P><FONT size=4></FONT> </P>
<P><FONT size=4><IMG border=0 alt="" src="http://i469.photobucket.com/albums/rr53/suns0003/27.jpg"></FONT></P>
<P><FONT size=4></FONT> </P>
<P><FONT size=4>把機器從 AUTO 改為 MANUAL 後,按下 WHT BAL</FONT></P>
<P><FONT size=4></FONT> </P>
<P><FONT size=4><IMG border=0 alt="" src="http://i469.photobucket.com/albums/rr53/suns0003/7-2.jpg"></FONT></P>
<P><FONT size=4></FONT> </P>
<P><FONT size=4>把撥桿撥到 PRESET</FONT></P>
<P><FONT size=4></FONT> </P>
<P><FONT size=4><IMG border=0 alt="" src="http://i469.photobucket.com/albums/rr53/suns0003/8-1.jpg"></FONT></P>
<P><FONT size=4></FONT> </P>
<P><FONT size=4>按一下撥桿右邊的按鈕</FONT></P>
<P><FONT size=4></FONT> </P>
<P><FONT size=4><IMG border=0 alt="" src="http://i469.photobucket.com/albums/rr53/suns0003/13-1.jpg"></FONT></P>
<P><FONT size=4></FONT> </P>
<P><FONT size=4>(此時螢幕右下角的色溫值會被反白)</FONT></P>
<P><FONT size=4></FONT> </P>
<P><FONT size=4><IMG border=0 alt="" src="http://i469.photobucket.com/albums/rr53/suns0003/9-1.jpg"></FONT></P>
<P><FONT size=4></FONT> </P>
<P><FONT size=4>用旋扭上下轉動便可正負 100K 的方式微調</FONT></P>
<P><FONT size=4></FONT> </P>
<P><FONT size=4><IMG border=0 alt="" src="http://i469.photobucket.com/albums/rr53/suns0003/13-1.jpg"><BR><IMG border=0 alt="" src="http://i469.photobucket.com/albums/rr53/suns0003/14-1.jpg"><BR><IMG border=0 alt="" src="http://i469.photobucket.com/albums/rr53/suns0003/15-1.jpg"><BR><IMG border=0 alt="" src="http://i469.photobucket.com/albums/rr53/suns0003/16-1.jpg"></FONT></P>
<P><FONT size=4></FONT> </P>
<P><FONT size=4>小弟補上圖像輔助說明~<IMG border=0 alt="<img" src="http://www.hd.club.tw/images/smilies/default/4.gif" smilieid="64"> <IMG border=0 alt="<img" src="http://www.hd.club.tw/images/smilies/default/4.gif" smilieid="64"> <IMG border=0 alt="<img" src="http://www.hd.club.tw/images/smilies/default/4.gif" smilieid="64"><BR>都歸功 Alex兄教得好~<BR></FONT></P>
[ 本帖最後由 suns0003 於 2010-1-15 23:09 編輯 ] |
評分
-
檢視全部評分
|


 狗仔卡
狗仔卡 發表於 2010-1-15 22:58:29
 提升卡
提升卡 沉默卡
沉默卡 喧囂卡
喧囂卡 變色卡
變色卡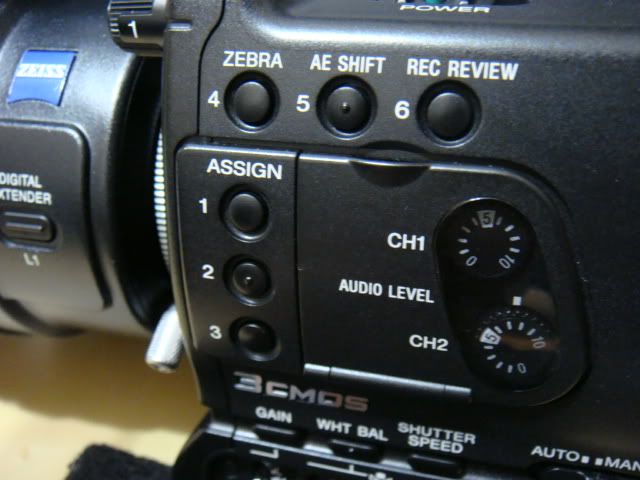 </FONT></P>
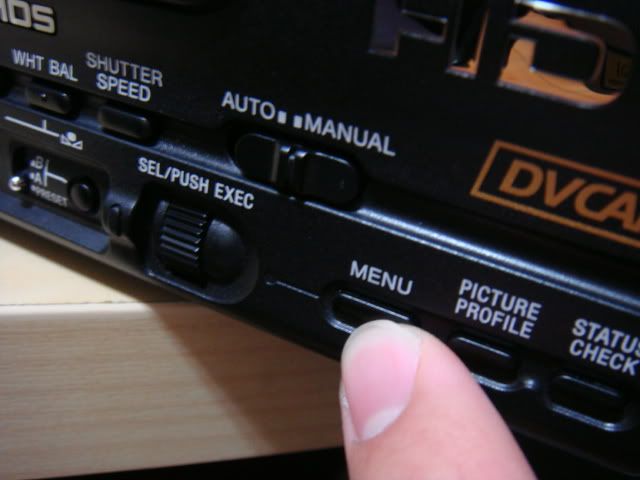 </FONT></P>
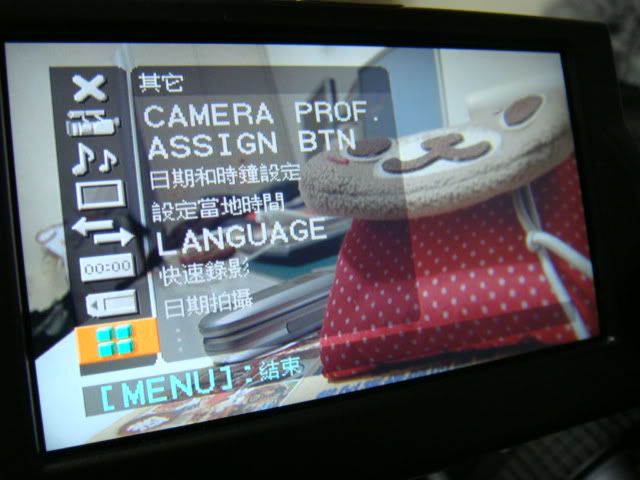 </FONT></P>
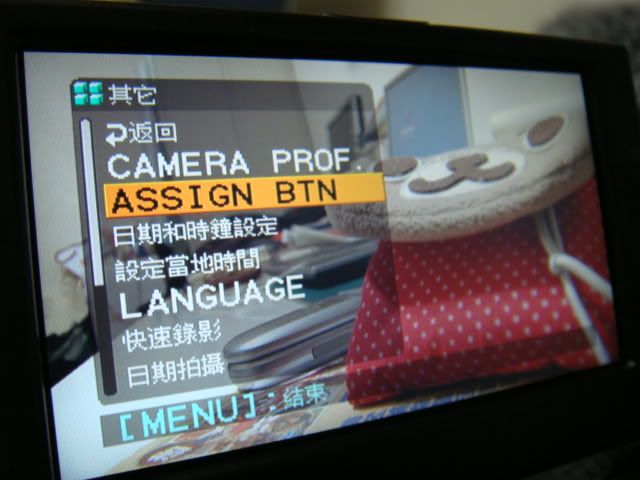 </FONT></P>
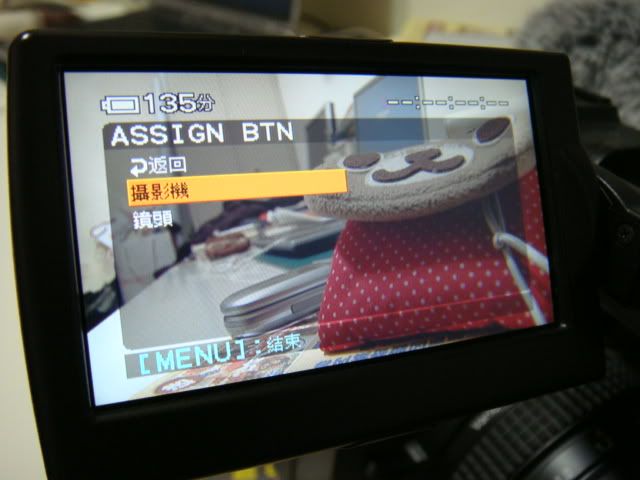 </FONT></P>
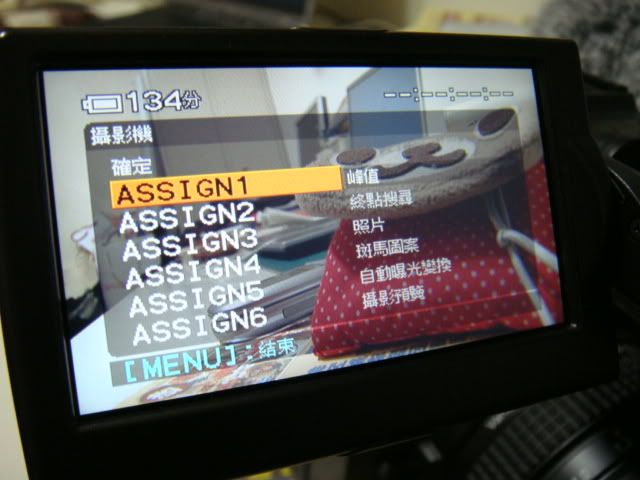 </FONT></P>
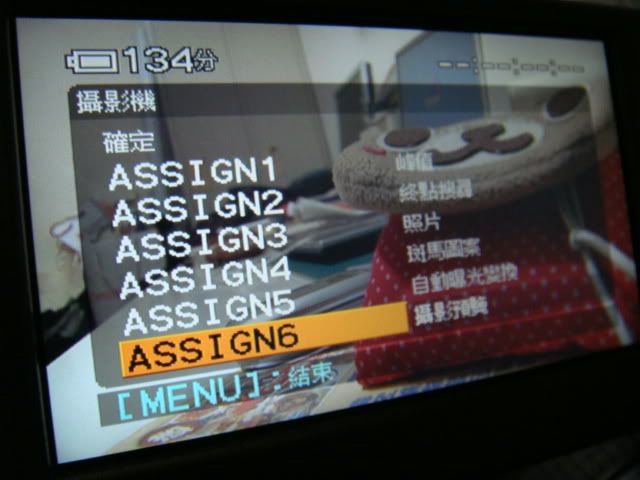 </FONT></P>
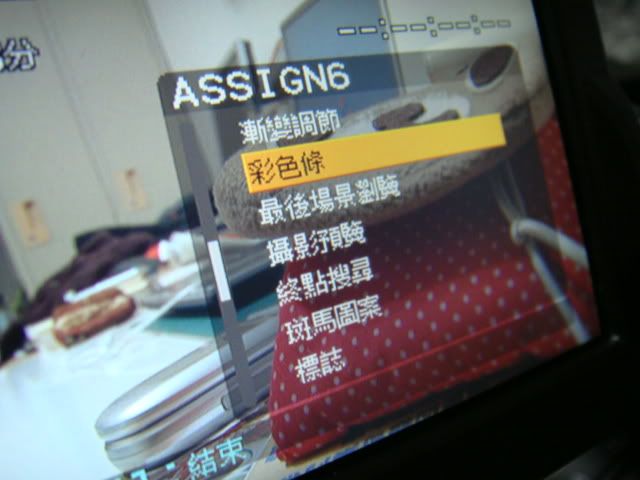 </FONT></P>
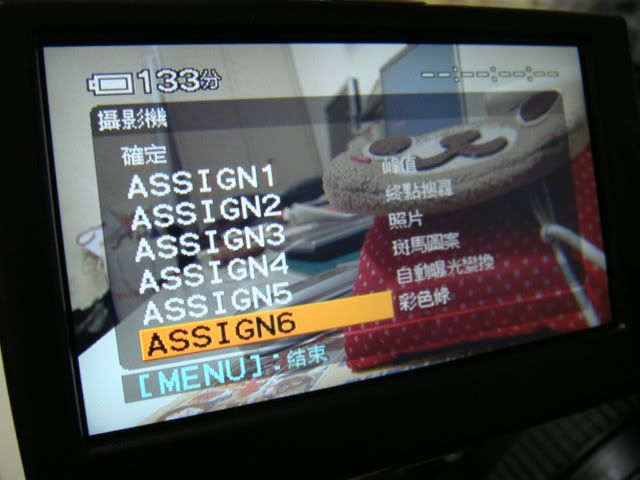 </FONT></P>
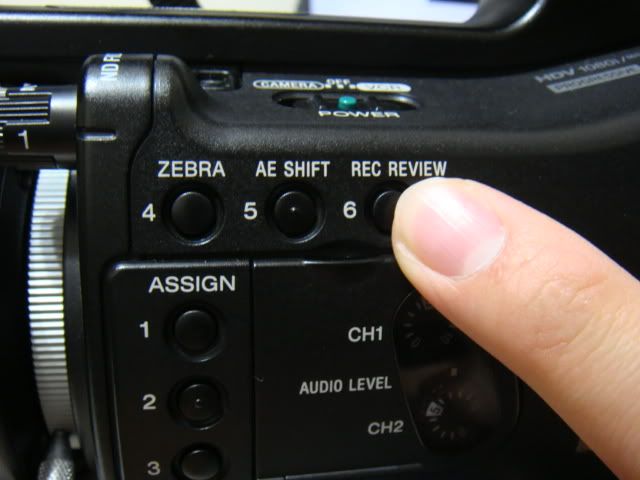 </FONT></P>
 </FONT></P>